Free Courier Delivery Australia Wide, Orders Over $150


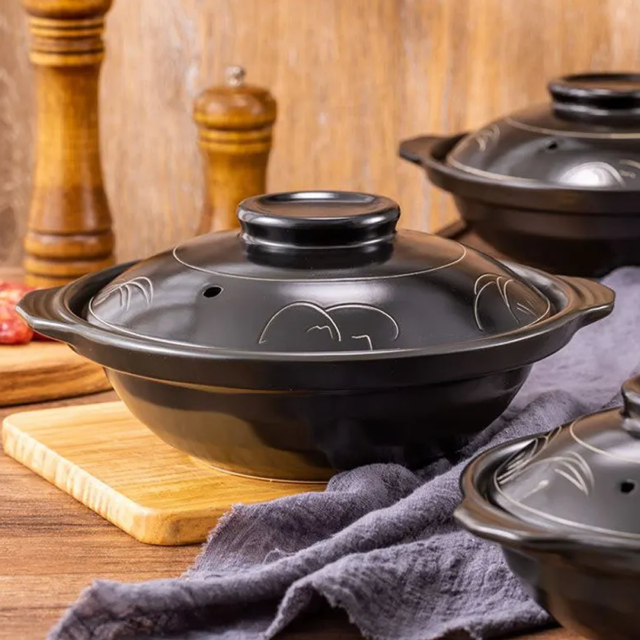
Ceramic Kimchi Fermenting Jar (17.5cm)
$79.80 inc. GST
The Ceramic Kimchi Fermenting Jar is designed to preserve the depth of flavor in your homemade pickles and kimchi. Crafted from ceramic, it features a traditional goldfish motif that adds an elegant, cultural charm.
- Material: Ceramic
- Dimensions: 17.5cm Diameter (Other Sizes Available POA)
- Capacity: 2.5kg
This jar supports natural fermentation, allowing beneficial bacteria to flourish while keeping contents sealed and fresh. An ideal choice for both novice and experienced fermenters seeking authenticity and functionality.
- Product Care
- How to Use
- Additional information
- Reviews (0)
Description
To maintain the Ceramic Kimchi Fermenting Jar, hand wash it gently with warm water and a mild detergent. Avoid using abrasive cleaners or placing it in a dishwasher, as these may damage the ceramic glaze and pattern. Allow the jar to dry thoroughly before storing or reusing to prevent moisture retention. Due to its handmade nature, handle with care to preserve its structural integrity and aesthetic details.
How to Use
Fermentation is an age-old technique that transforms fresh vegetables into flavorful and probiotic-rich delights like kimchi. Using a Ceramic Kimchi Fermenting Jar can enhance this process, bringing authenticity and efficiency to your fermentation endeavors. This article will guide you through the steps to effectively use a Ceramic Fermenting Jar, ensuring you achieve the best results for your homemade kimchi.
Preparing Your Ingredients
Before using your Ceramic Kimchi Fermenting Jar, it’s crucial to prepare your ingredients correctly. Start by washing and cutting your vegetables, typically Napa cabbage, radishes, and green onions, into bite-sized pieces. Prepare a seasoning mix with ingredients such as Korean red pepper flakes (gochugaru), garlic, ginger, and fish sauce. This mixture is vital for achieving the right flavor profile in your kimchi. Ensure all your ingredients are fresh, as this will impact the quality of your final product.
Cleaning and Prepping the Jar
Clean your Ceramic Kimchi Fermenting Jar thoroughly before use. Wash it with hot, soapy water and rinse it well. Avoid using abrasive cleaners, as they can damage the ceramic surface. Once cleaned, allow the jar to air dry completely. The jar’s durability and resistance to moisture make it ideal for fermentation, but it’s important to ensure it is completely dry to avoid any unwanted bacterial growth.
Packing the Jar
Begin packing your prepared vegetables and seasoning mix into the Ceramic Fermenting Jar. It’s essential to pack the ingredients tightly to minimize air pockets, which can lead to spoilage. Use a tamper or the back of a spoon to press the vegetables down firmly. This process ensures that the vegetables are submerged under their own juices or any added brine, which is crucial for proper fermentation.
Using the Fermentation Weights
If your Ceramic Kimchi Fermenting Jar comes with fermentation weights, place them on top of the packed vegetables. These weights help keep the vegetables submerged, preventing exposure to air, which can cause mold growth. If your jar does not include weights, you can use a clean, heavy object or a zip-lock bag filled with water as a substitute. The goal is to ensure that the vegetables remain fully submerged throughout the fermentation process.
Sealing and Storing
Once packed and weighted, cover the Ceramic Fermenting Jar with its lid. Proper sealing is crucial to create an anaerobic environment that supports the fermentation process. Store the jar in a cool, dark place, such as a pantry or cupboard, where the temperature remains consistent. The ideal temperature for kimchi fermentation is between 18-22°C (64-72°F).
Monitoring and Fermentation Time
Check your Ceramic Kimchi Fermenting Jar daily for the first few days. You may notice bubbles or a slight increase in liquid, which is a sign that fermentation is underway. Depending on your taste preference, kimchi typically ferments for 3-7 days. For a tangier flavor, allow it to ferment longer. Remember to taste the kimchi periodically to determine when it reaches your desired level of fermentation.
Storing Your Kimchi
Once your kimchi has reached the desired fermentation level, transfer the jar to the refrigerator. The cooler temperature will slow down the fermentation process and help preserve the kimchi for several months. Properly stored, your kimchi will continue to develop complex flavors over time.
Using a Ceramic Kimchi Fermenting Jar not only enhances the fermentation process but also adds an authentic touch to your kitchen. By following these steps, you can enjoy homemade kimchi with rich flavors and beneficial probiotics, making every meal a delightful experience.
Additional information
| Weight | 5 kg |
|---|---|
| Availability | In Stock |
| Brand | Katachiware |
| Care Instructions | Hand Wash Only |
| Colour | Blue & White |
| Condition | New |
| Finish | Gloss |
| Made In | China |
| Material | Ceramic |
| Warranty | 12 Months |
| Pattern | Blue Fish |
Be the first to review “Ceramic Kimchi Fermenting Jar (17.5cm)”
You must be logged in to post a review.


Reviews
Be the first to review this product.